Gluten Free Lemon Poppy Seed Pumpkin Muffins

Hi Your Fit Day Friends!

Well, spring is here in the Bay Area and the days are getting warmer and longer.

And with more warm weather comes sunshine. And as always, that means more lemons from my friend’s lemon tree. Actually, here in California we are blessed with lemons hanging all year round.

I love lemon-y anything!

So when life hands you lemons, what do you make?

Cakes, cookies, muffins and pies. That’s what!

And what goes with lemon? Poppies Poppy seeds, that’s what. And I love poppy seeds.

Those little crunchy poppy seeds with their bursts of nuttiness. There’s nothing like a sweet pastry, cake, cookie or dough laced and filled with poppies I mean poppy seeds!

I first developed this muffin a couple years ago, after my shoulder surgery, when I started using the Carnbite® Solution Plan, which I stayed on for about 1 1/2 years ( A little too long, but that’s another blog I’ll be following up with).

So it was during this time I was inspired to start baking more gluten free deserts for both me and my clients.

And I had a real yen for lemon poppy seed bread.

After many failed attempts, and a bunch of bricks, I finally came up with my own gluten free version for lemon poppy seed muffins, which are also delicious baked as small tea cakes.

I use Kabocha squash, also known as Japanese pumpkin, because of it’s rich creamy texture, and is my ‘go to’ substitute for fat in almost any baked good. But you can also use canned pumpkin, or another winter squash.

As you make more of my recipes, you’ll see that I use Kabocha in most of them. It’s super nutritious and packs a punch with vitamin A. It’s a bit starchy though, so a little goes a long way.

This muffin is by no means low carb, so it can be a great addition to your post workout protein to round out the meal.

But my favorite time to have this is for my desert after dinner, when I let those carbs coax me into a deep sleep, where I dream of…  poppies …I mean my next days challenge in the weight room!

Be careful though, as the Yum factor of this muffin is quite high, and you may find yourself stuffing your face with the whole bunch!

Let’s start baking!

Photo credits go to my good friend Jos at www.delightfultastebuds.com. Make sure to visit her site full of yumminess!

Gluten Free Lemon Poppy Seed Pumpkin Muffins
 
Prep time
Cook time
Total time
 
A quick and easy gluten free lemon poppy seed muffin made with kabocha pumpkin squash and rice flour
Author:
Recipe type: Desert
Cuisine: American
Serves: 6
Ingredients
  • ½ cup white rice flour
  • 1 tsp baking powder
  • ½ tsp baking soda
  • ¼ tsp salt (I used fine sea salt)
  • 3 tbs sweet potato starch or potato starch. You can buy sweet potato powder(starch) at local Asian market or maybe on Amazon
  • 10 gram whey isolate (i use zero carb raw pastured from Z-natural)
  • ½ cup baked kabocha (Japanese pumpkin)squash that is pressed into the ½ cup measure cup. You can also use butternut or acorn squash. Canned pumpkin is an option too if you don’t have any winter squash.
  • 2 egg whites
  • 1 tsp coconut oil
  • 3 tbs lemon Juice
  • 2 tbs water or almond milk
  • 1 tsp vanilla
  • ¼ Stevia, or to taste. Or ½ cup erythritol (I've also used about ½ cup granular Splenda )
  • 1-2 tbsp poppy seeds. Macros are for 1 tbsp
Instructions
  1. Mix dry together in small bowl, except sweetener and poppy seeds
  2. In medium bowl , using hand mixer, blend together wet ingredients and sweetener.
  3. Add dry to wet and mix with spoon until smooth and everything is incorporated
  4. Fold in poppy seeds
  5. Using approximately ¼ cup measure, divide batter into 6 silicon baking cups, or 6 paper lined muffin tins (note that rice flour baked goods will stick to the sides of paper liners and make it hard to peel off); or divide into TWO 3” non stick ramekins (or lightly oiled non stick ceramic ramekins)
  6. It should make 6 muffins. I think the last muffin was short so I took like ½ tsp out of others to even it out
  7. Bake 365 for 30-40 minutes depending on if you’re using small muffin cups or 2 larger ramekins. Smaller muffins check at about 25 minutes. Mine usually take about 35 minutes, but it depends on if my oven is running on the cooler side.
  8. Tops should be brown.
  9. Test a muffin by slicing out a small portion. If the center is still a bit gooey put back in oven for another 5-8 minutes. The toothpick test may not necessarily work with this muffin
  10. Cool muffins for 5 minutes before removing from cups
  11. These are amazing with coconut oil, coconut butter, or even a blueberry compote drizzled on top!
Nutrition Information
Serving size: 6 Fat: 2 Carbohydrates: 27 Protein: 2

How nice these would be with a some of my homemade lemon coconut butter spread!


Gluten free lemon poppy seed muffins
Lemon and Poppy Seeds…Yum! Photo: Jos www.delightfultastebuds.com


Gluten-Free Rice Flour Pumpkin Skillet Biscuits

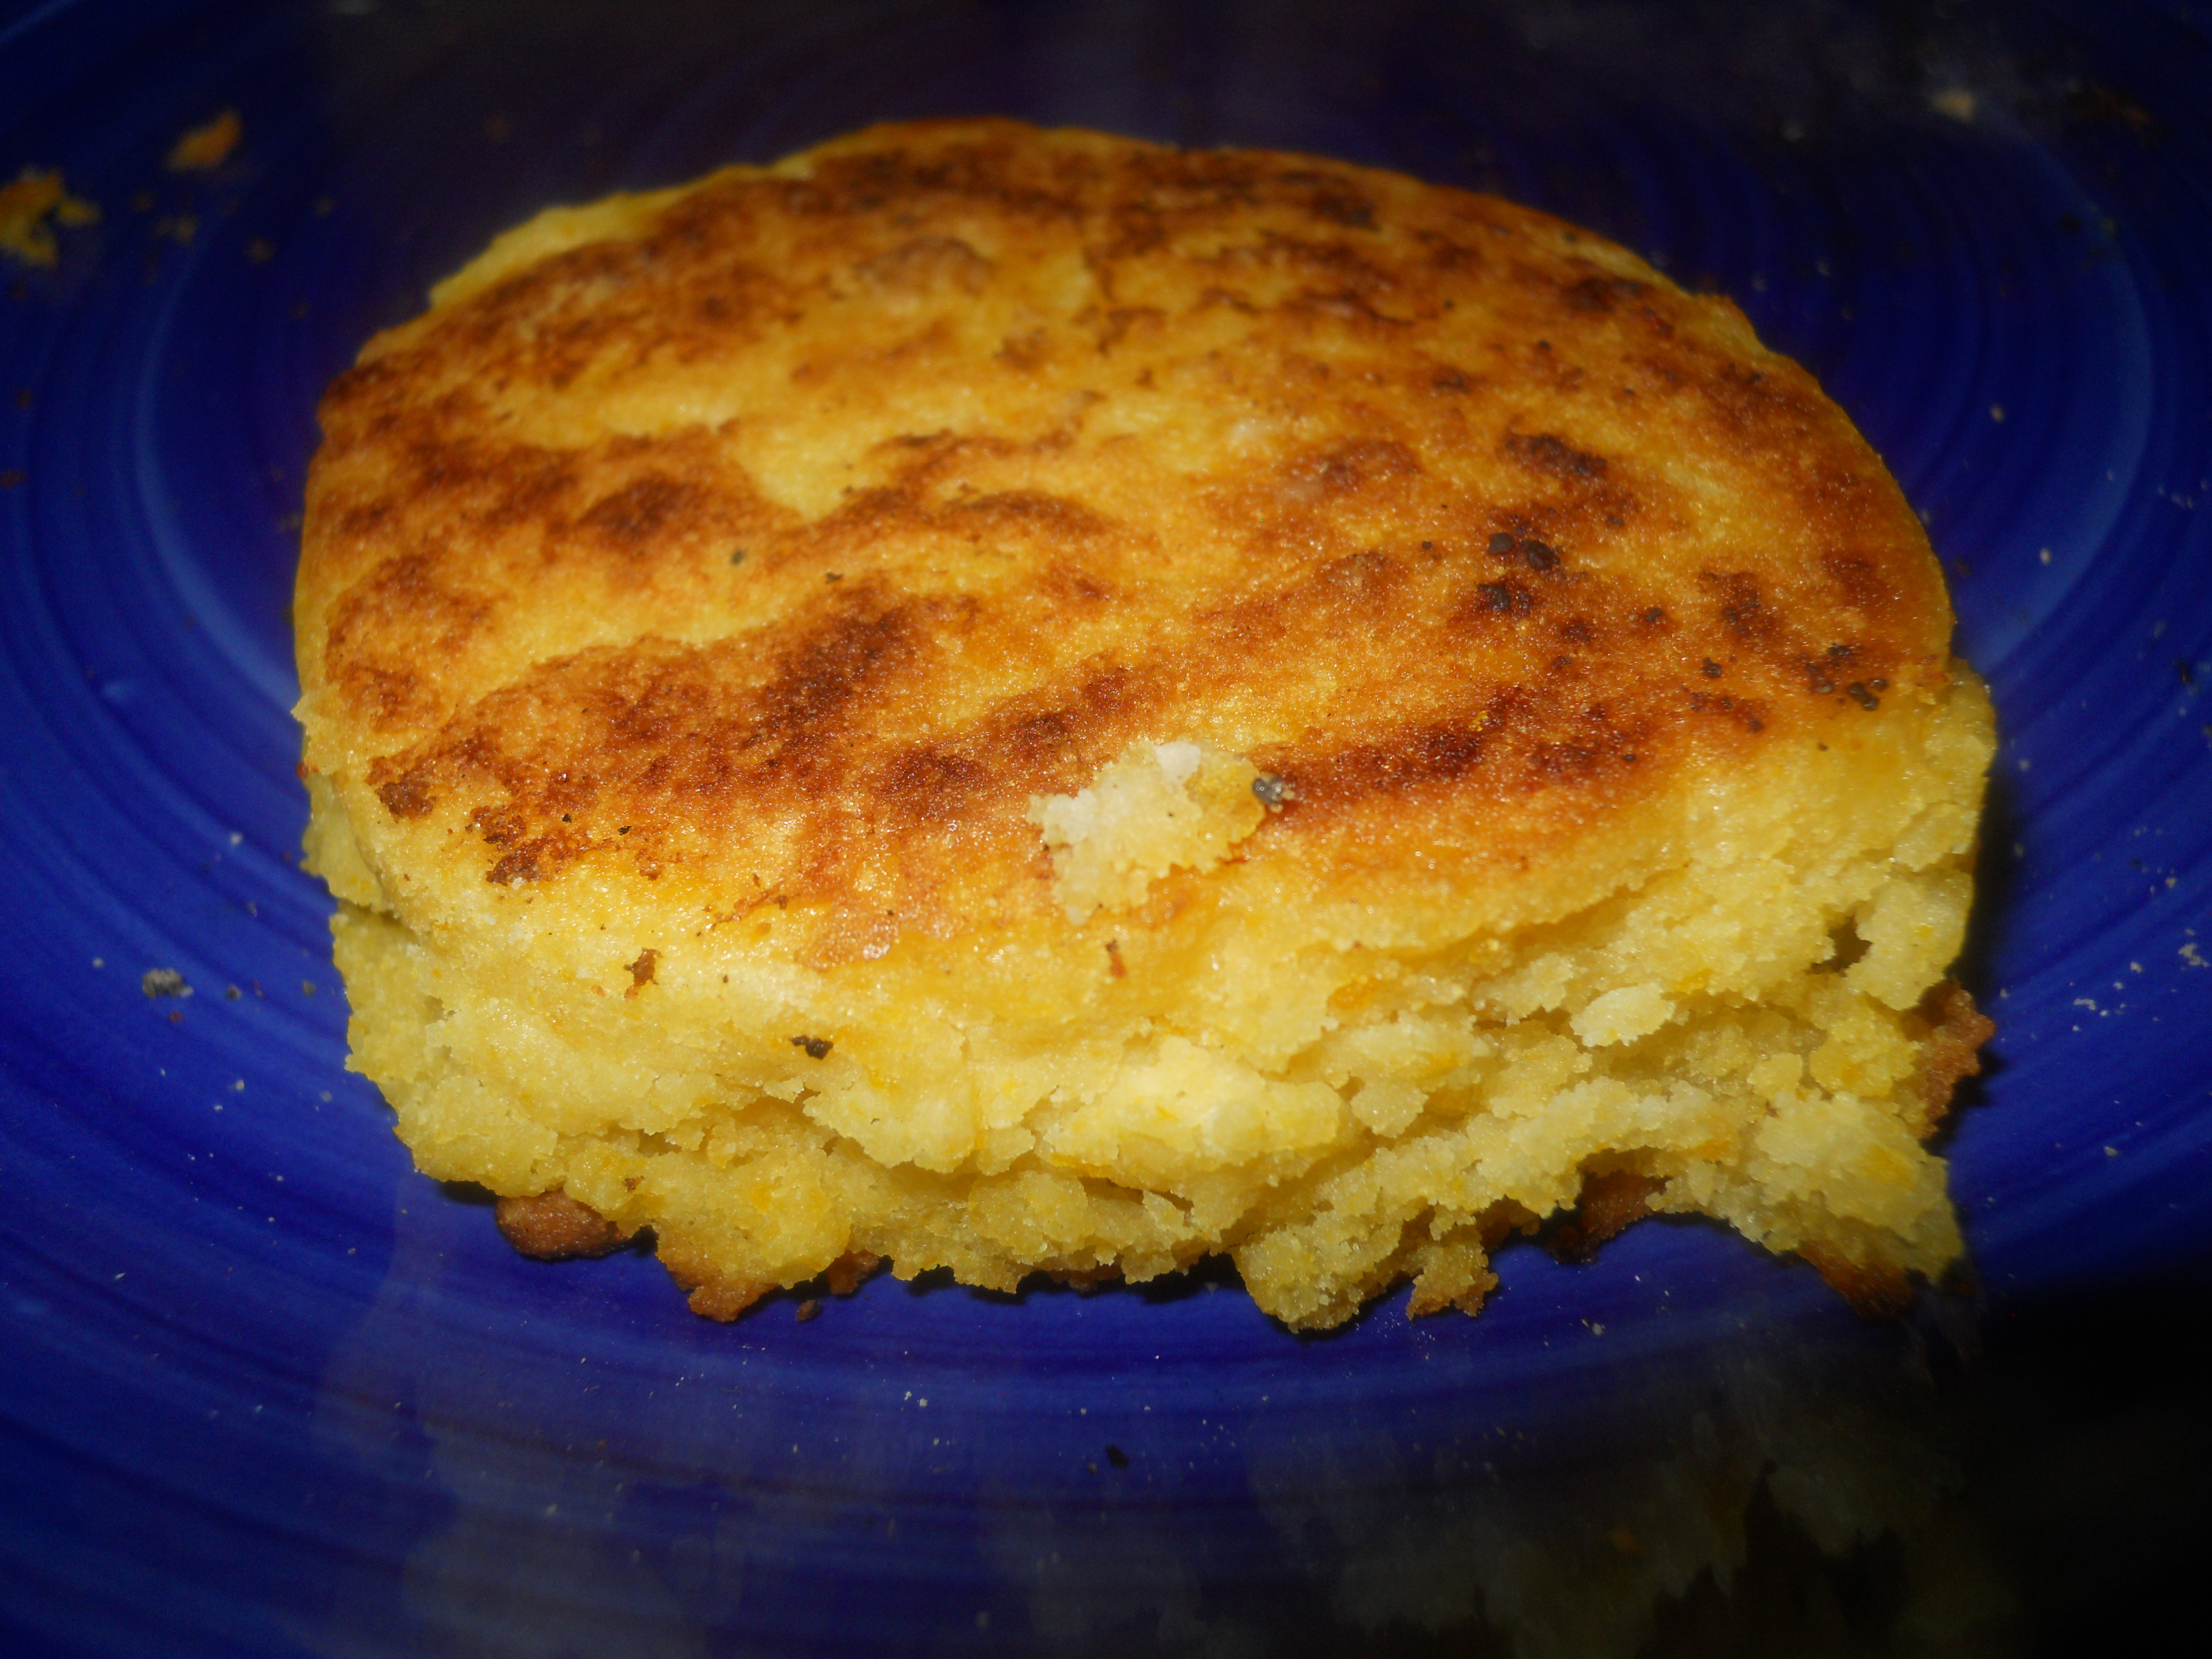
Crisp  on the outside...sweet and creamy like porridge on the inside.
Crisp on the outside…sweet and creamy on the inside.

Hello Your Fit Day Friends!

I want to let you in on a secret. Carbs are not evil. Really. They’re not. And neither are my Gluten-free Rice Flour Pumpkin Skillet Biscuits. Trust me on this one! It’s more about which carbs you choose, how you cycle them into your diet, and how to make them work for you.

If you haven’t read my last post, where I talk about why I’m using the Carbnite® Solution Plan, stop and click here first. That should explain it all. Well, a lot anyway.

Now, I’m all about helping you stay lean and fit, so some of the best times to indulge in my starchy treats would be:

  1. After a weight training session, preferably in the evening.
  2. When you’re on a Low Carb High Fat ‘diet’, where a re-feed of starches will help boost your metabolism. (Low Carb diets are typically low calorie, due to the satiating effects of fat. You are eating more fat, aren’t you?!!)
  3. Anytime,  because you really don’t care about all this carb timing stuff; you’re here mostly for the yummy gluten-free and sugar-free recipes, high carb or low carb; and because you want to impress someone with your gluten-free, sugar-free baking skills instead of serving them bricks. I know, I’ve had my share of them too!

So, I’ve decided to travel outside the box of my post-workout-world staples of straight-up sweet potatoes and kabocha squash, and get creative in the kitchen. And I’ll be delivering them to you one bite at a time, all gluten-free and sugar-free!

First, I thought I’d give my hand a try at making some biscuits. You know, those light, fluffy, flaky shortcakes, that catapult you into a state of carb-coma euphoria.

But when I was searching the web for “gluten free rice flour biscuits” I hit a stumbling block: I could only find super high-fat and sugar laden recipes, most of which included slow carb flours from grains and legumes. Not exactly what we’re looking for post-workout, or for a program like Carbnite®, which you read about here.

So after some searching and tweaking of recipes, I think I came up with a pretty good gluten-free, sugar-free, low fat biscuit. Sounds like an oxymoron, doesn’t it?

Ah ha! But it’s not! And to prove it, below is my modified version of a skillet biscuit I found over at The Daily Diatribe. I replaced most of the fat, and all of the applesauce (fructose), with Japanese pumpkin (Kabocha squash); and I used stevia instead as the sweetener, instead of the maple syrup.

You could use any type of dense starchy winter squash if you don’t have Japanese Kabocha pumpkins. Or you could use canned pumpkin. However, I can’t vouch for the canned pumpkin because I haven’t tried it yet. But I’m sure it would work. Although, I wouldn’t add any extra water to make a mash, since canned pumpkin is already the right consistency. If you do try it please let me know how they turn out in the comments below.

Mind you my version didn’t end up exactly light and fluffy, like regular biscuits.  Instead they are a bit flatter, crispy on the outside, with a creamy and sweet, baked porridge-like texture on the inside; and very carb-coma worthy!

I also saved out two 1/4 cup portions of the batter and baked them at 400 degrees F for about 30 minutes until the tops were a deep golden brown. They save you a bit of fat and I think they are just as crunchy and creamy and delicious.

I find both ways rather addicting.

For some extra added comfort I drizzled a few swirls of my homemade lemon-blueberry compote on top…Divine! (Recipe coming soon)

Some Variations to try:

Bacon Skillet Biscuit (I have not tried this as of yet, but I imagined it to be yummy?): Cook 4 strips of bacon until crisp. Cut each slice in half, so that you have eight pieces.  Crumble each 1/2 strip.  Gently press each 1/2 crumbled strip into each 1/4 cup of scooped batter before ladling onto skillet. Cook per directions.

Blueberry Skillet Biscuit (I have tried this and it is yummy!): Wash and pat dry 8 oz of organic blueberries. Divide into eight separate one ounce servings. Dust each ounce serving with rice flour. Add one ounce of blueberries to each 1/4 cup of scooped batter. Cook per directions.

Chocolate chip variation (I have not tried this yet, but chocolate with everything, including bacon, is yummy!): Measure out eight 1 oz servings of gluten free dark chocolate chips. Add one ounce of chips to each 1/4 cup of scooped batter. Cook per directions.

Savory Chive and Herb (I have tried this with my Ultra Low Carb biscuits-recipe coming soon-and they are Yum Yummy!): For savory biscuits you can fold in some fresh chives, or your favorite blend of fresh or dried herbs, to the mixed batter. Cook per directions

I hope you like them as much as I do. Please let me know in your comments below.

And don’t forget to sign up for my newsletter, in the above right hand corner, so you don’t miss out on the fun!

Biscuits that melt in your mouth
Biscuits that melt in your mouth…drool!
Gluten Free Rice Flour Pumpkin Skillet Biscuit
 
Prep time
Cook time
Total time
 
A sweet and savory biscuit with a hint of vanilla. Lightly cooked in coconut oil on your skillet makes for a crisp savory crust with a sweet creamy inside, similar to a thick griddle cake. You can also try baking these biscuits too.
Author:
Recipe type: Appetiser
Cuisine: Gluten Free
Serves: 8
Ingredients
  • 1 cup non-dairy milk (I used Whole Foods 365 Almond milk unsweetened)
  • 1 tablespoon apple cider vinegar
  • 1⅓ cups white rice flour (not sweet white rice flour or brown rice flour)
  • ¾ teaspoon baking soda
  • ¼ teaspoon salt
  • 2 tablespoons melted coconut oil
  • 4 tablespoons sweet potato mash (4 tbsp baked kabocha squash* with 1-3 tbsp of water to make puree the consistency of applesauce. This is important. This will depend on the moisture content of your winter squash. You will end up with slightly more puree than 4 tbsp. I usually add it all since it's just a little bit more)
  • ¼-1 tsp liquid stevia, to taste. Start with small amount as it's very potent.
  • 1 teaspoon pure vanilla extract
  • * You can also use winter squash such as acorn, butternut.
  • * You can also use canned pumpkin, but you don’t need to add any extra liquid to make it a puree, since it's already the right consistency.
Instructions
  1. Stir together the milk and apple cider vinegar and set aside to curdle. Begin heating a skillet on medium to allow it to get nice and hot.
  2. In a medium bowl, whisk together the flour, baking soda and salt.
  3. Add the oil, kabocha mash puree and vanilla to the milk and stir.(If making savory biscuits then omit vanilla and instead add your favorite spices, maybe onion powder, garlic, red pepper flakes, to flour mixture). These are still savory-sweet, if you stick to original recipe.
  4. Make a well in the center of your dry ingredients, pour in the wet ingredients, and stir together just until completely mixed.
  5. Add oil to your skillet(I just coat the pan), then scoop the batter into the skillet, using a ¼ measuring cup per biscuit. Try and shape the biscuits so they are high when you scoop them out of the measuring cup. (Actually, I whacked the pan to get them out; or you can be more civilized and use a spoon).
  6. Cook for 4 minutes, then flip. Immediately cover the skillet with it's lid (or find something to cover it with) and cook for another 4 minutes.
  7. I didn't have a top so mine were a bit flat, but they still puffed up.
  8. Remove from skillet and let cool about 5 minutes before serving.
  9. If they are not crispy for your liking, or you prefer the centers to be a bit more baked, you can put them into an oven at 350 for a few minutes to crisp them up.
  10. Best eaten warm.
Notes
You can also bake the biscuits in a pre heated 400 degree F oven for about 30 minutes, or until the tops are a deep golden brown. I kept biting into mine to see if they were done. After about 30 minutes of taste testing, and not much biscuit left, I proclaimed them to be delicious!

These freeze well in a zip lock bag. To reheat simply thaw and bake for about 5-8 minutes in a 300 degree oven or until crispy and crunchy again.


Nutrition Info for the Variations
Per Biscuit

Bacon: Fat:8.5grams; Protein: 6.5grams ; Carbs same as original

Blueberry: Carbs:29grams ; Fat and Protein same as original

Chocolate Chips(Enjoy Life Brand): Fat:13 grams ; Carbs:41grams ; Protein:5
Nutrition Information
Serving size: 8 Fat: 4 Carbohydrates: 23 Protein: 2
Crunchy on the outside, creamy on the inside!